
This help document shows you how to configure the Schoology external tool to work with the Curriculum Engine Common Cartridge export of your course.
*NOTE* Only District Supervisors or School Administrators can export a course to a Common Cartridge file. The Curriculum Engine exports a Thin Common Cartridge file.
After completing the export of the course common cartridge file, import the downloaded thin common cartridge export file into Schoology's Resources.
Setup the LTI 1.3 Tool for the course in the Schoology App Center under My Developer Apps

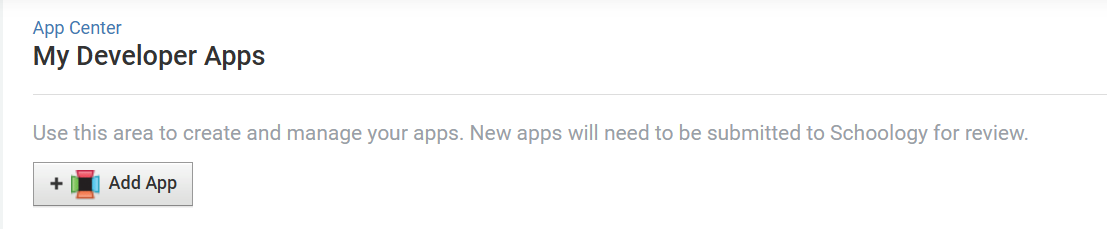
Click +Add App in My Developer Apps
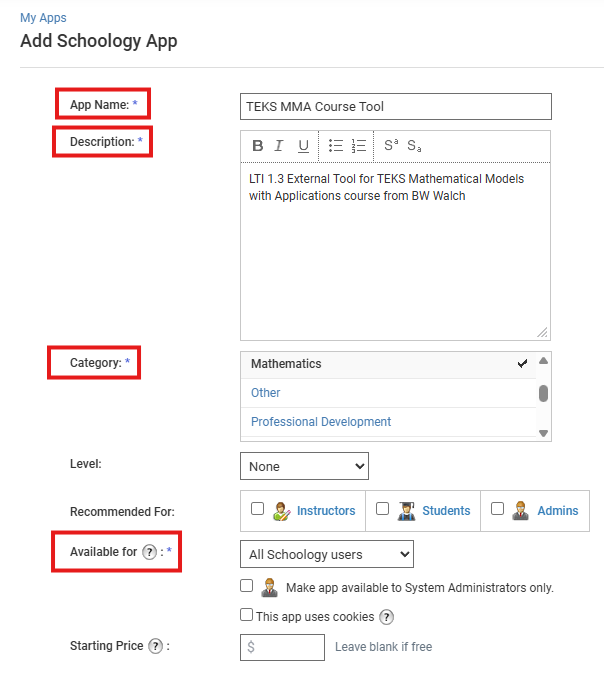
Complete the mandatory fields, be sure to include the course name in the App Name field.
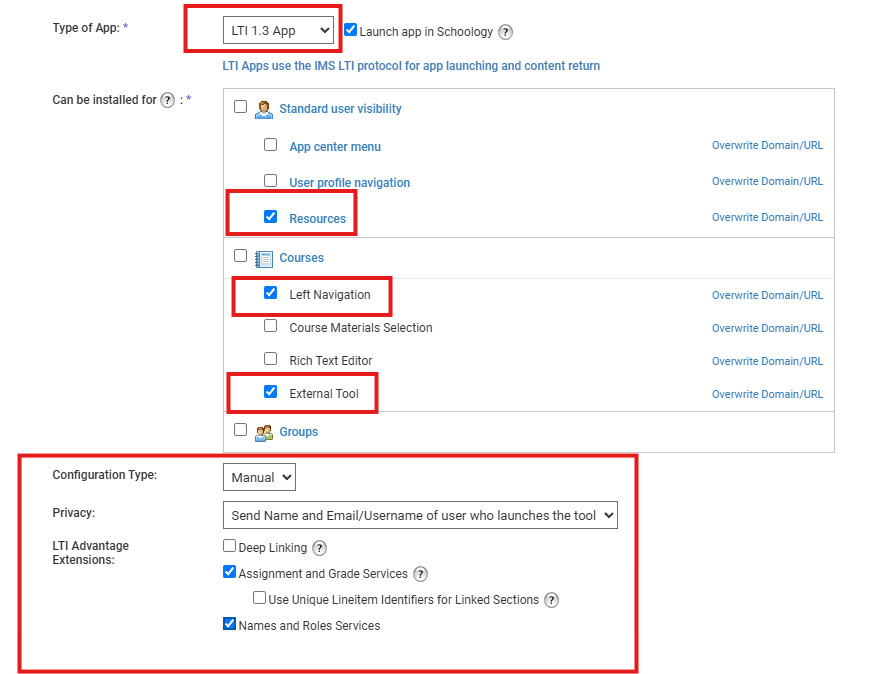
Scroll to the bottom section Type of App and make these selections.
The last step is to enter API endpoints for the Curriculum Engine common cartridge export into the fields. Leave the Tool Public Key and Customer Parameters fields blank.
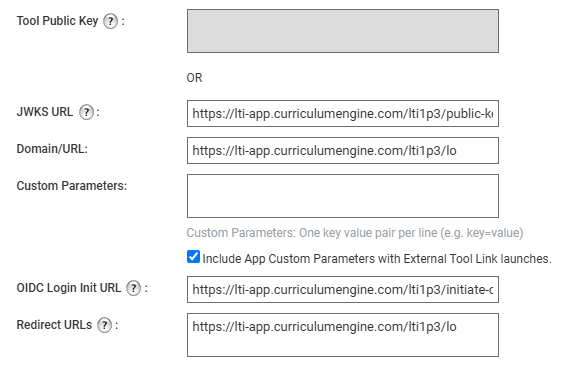
Here are the values to paste into the configuration fields to Schoology.
| Field name | Value |
| JWKS URL | https://lti-app.curriculumengine.com/lti1p3/public-key |
| Domain/URL | https://lti-app.curriculumengine.com/lti1p3/lo |
| OIDC Login Init URL | https://lti-app.curriculumengine.com/lti1p3/initiate-oidc-login |
| Redirect URLs | https://lti-app.curriculumengine.com/lti1p3/lo |
Be sure to click Submit when done to save the entries.
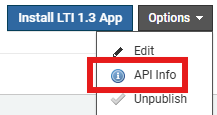
In the Options dropdown next to the Install LTI1.3 App button for the app just created, select App Info. Keep this browser tab open because you will return shortly to install it.
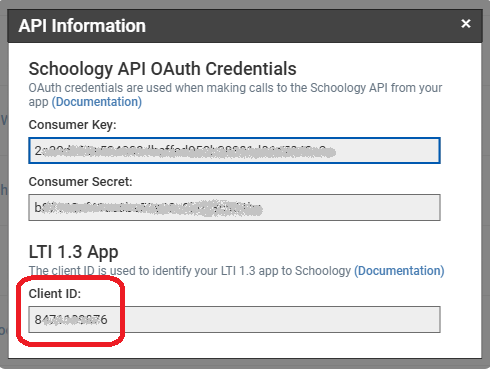
Copy the Client ID value for the app.
Go to the common cartridge export for the course in the Curriculum Engine under ADMIN/Common Cartridge to add the consumer configuration.
Click the wheel to open the Configure Tool Consumer screen.

Paste the Client ID from Schoology into the 2nd field in the Curriculum Engine. Complete the remaining mandatory fields with the values below. Click Save when done.
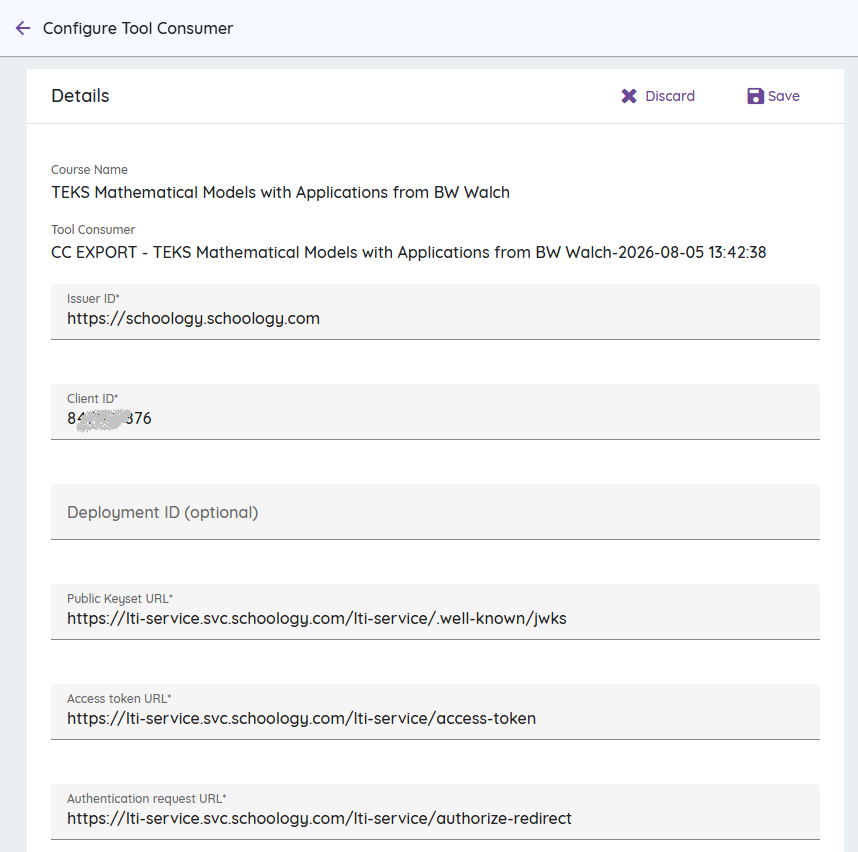
Here are the field values to enter into the field above in the Curriculum Engine.
| Field name | Value |
| Issuer ID | https://schoology.schoology.com |
| Client ID | from Schoology LTI 1.3 App Info |
| Public Keyset URL | https://lti-service.svc.schoology.com/lti-service/.well-known/jwks |
| Access Token URL | https://lti-service.svc.schoology.com/lti-service/access-token |
| Authentication Request URL | https://lti-service.svc.schoology.com/lti-service/authorize-redirect |
Next, go back to the LTI 1.3 app you created in Schoology to install it by clicking on Install LTI 1.3 App and install it for "Add to Institution". From the App Center, My Developer Apps, find your course's external tool name in the list and click Install/Remove and select All Courses. Click Submit to finish.